Acid Etching
Acid etching, from the German word meaning “to eat,” is cutting into a surface of a material using acid. The method of etching on metal can be a chemical process using acid, a photochemical process, or an electrochemical process. The basic technique for acid metal etching is to apply a resist to the areas of a metal plate, either to the whole plate or just to the areas that one wants to remain unaffected. The parts of the metal to be etched are either not covered or the resist material is scratched off from them using tools such as an etching needle and an echoppe.
The metal plate is then dipped in acid which eats away the exposed surface of the metal, creating lines. To make a print, the resist is cleared away and the surface inked. When the surface is wiped, the ink remains in the etched lines and can then be captured on paper when put through a specialized printing press. Varying line depth is accomplished by removing the plate periodically and covering the lines that have reached the desired depth with the resist material. This can also be done by applying acid to the plate directly rather than bathing it.
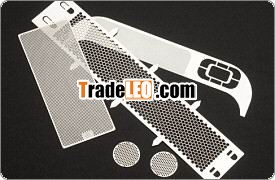
Precision Etched products from the DONGYAO-Line
Typical products include filters and sieves in a variety of shapes, sizes and functions, lead frames, flat springs, encoder discs or fuel cells.
More precision metal etching:
Industry: Name Plates, Name/VIP Card, Discs Encoder, Architectural Model Parts, metal Seals, Dial Faces, Diaphragms, metal Disc
Decorative: Engraving, Filter of Teapot, Souvenirs, Label and Badges, Medals, Bookmarks, Earrings, Rings, etc.
Precision Etching metal Dimensions
Because of the many parameters involved in determining etching tolerances, it is impossible to give a definite, absolute rule to cover all circumstances. Some of the more common variables which affect the etching tolerances are: type of metal being etched, size of panel, equipment being used, and yield required. For purposes of establishing some general rules of thumb, a tolerance of +/- 15% of the metal thickness is usually acceptable. The two tables below give tolerances to be expected for varying metal thicknesses and flat sizes.
Prototype and Short Runs (Approximate) SIZE and THICKNESS (inch)
| .001″ | .002″ | .005″ | .010″ | .015″ | .020″ | .040″ | |
| 2″X2″ | Empirical | +/-.0005″ | +/-.0007″ | +/-.0010″ | +/-.0015″ | +/-.0020″ | +/-.0040″ |
| 8″x10″ | Empirical | +/-.0007″ | +/-.0010″ | +/-.0015″ | +/-.0020″ | +/-.0030″ | +/-.0050″ |
| 12″x18″ | Empirical | +/-.0010″ | +/-.0015″ | +/-.0020″ | +/-.0030″ | +/-.0040″ | +/-.0060″ |
Tolerances on full production runs (Approximate) SIZE and THICKNESS (inch)
| .001″ | .002″ | .005″ | .010″ | .015″ | .020″ | .040″ | |
| 2″X2″ | Empirical | +/-.0010″ | +/-.0010″ | +/-.0015″ | +/-.00120″ | +/-.0030″ | +/-.0050″ |
| 8″x10″ | Empirical | +/-.0010″ | +/-.0015″ | +/-.0020″ | +/-.0025″ | +/-.0040″ | +/-.0060″ |
| 12″x18″ | Empirical | +/-.0015″ | +/-.0020″ | +/-.0025″ | +/-.0035″ | +/-.0045″ | +/-.0070″ |
Center–to-Center Dimensions
Generally, for small pieces, it is possible to etch photochemically machined parts which will tend to duplicate the center-to-center dimensions which exist on production artwork. Because of limitations in thee area of artwork preparation, the following table gives practical center-to-center dimension tolerances for finished parts.
| (Inches) | Tolerances |
| 1.0″ or Less | +/-.0005″ |
| 1.0″ – 3.0″ | +/-.0010″ |
| 3.0″ – 6.0″ | +/-.0020″ |
| 6.0″ – 10.0″ | +/-.0030″ |
Relationship of Hole Size and Slot Width to metal Thickness
As a general rule, the diameter of a hole or the width of a slot cannot be less than 1.2 times the metal thickness. This relationship does vary as the metal thickness changes, as shown in the following chart.
| Practical | Tolerances | |
| Thickness | Hole Size | Attainable |
| 0.0020″ | 0.0050″ | +/-.0010″ |
| 0.0050″ | 0.0060″ | +/-.0015″ |
| 0.0070″ | 0.0080″ | +/-.0015″ |
| 0.0100″ | 0.0120″ | +/-.0020″ |
| 0.0200″ | 0.0260″ | +/-.0030″ |
Relationship of Line Width to metal Thickness
Spacing between holes and slots generally presents no problem in chemical machining. However, when a part contains a large number of slots or holes, this spacing becomes a design factor. Again, the space between holes in this case is related to metal thickness. In metals less than .005″ thick, line widths must be at least the metal thickness. With metals over .005″ thick, line widths must be at least 1.2 times the metal thickness.


