Description:
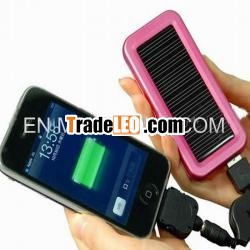
Solar mobile charger1.with 4 led light
2.can work as a LED flashlight
3.good quality, fast delivery
| Operate | ||||
| 1.Charge this solar charger | ||||
| 1) This solar charger can be charged automaticallyby solar panel in the sun. | ||||
| 2)IN port is input interface.When 30% blueindicator lights on, it shows this charger need to be charged.Plugthe mini USB end into "IN" port of this charger and connect the bigUSB end with the USB port of computer or your AC adapter, the "solar" red indicator lights on always amid charging. Afterfully charged, the red indicator will go out. | ||||
| 2.Charge other devices: | ||||
| OUT port is output interface. Connect the outputend of USB retractable with the device which needs to be chargedand plug big USB end into “OUT” port, then move the "ON/OFF" buttonto "ON" position, it shows the normal charging status as the greenindicator is blinking.After charging finished, the green indicatorwill stop blinking and light on always. | ||||
| Note: If the power is not connecting and chargingother products which need to be charged after start, the power willautomatically shut down in 20 seconds. |
SolarCharger
User’sGuide
Power LevelSignal
|
Blue light charging
RedLight full charged
ElectricalCharacteristics/
Performance
1. Output Voltage: 5V
2. Output Current:350~800mA
3.Solar Panel (multi/monocrystalline):
6.0V/60mA(Max)
4. Rechargeable Lithium-ionBattery: 1300mAh
5. Time required delivering powerfrom Solar Charger when charging a device: 30 to 45minutes.
6.Time required charging SolarCharger’s internal battery using the master cable connected to a PCor laptop: 3 to 5hours.
7.Time required charging SolarCharger’s internal battery in bright sunny conditions using thesolar panels: 10 to 18 hours.
Note-light quality and time of year play a key rolein determining the speed of charge. Cloudy days, thewinterandSolar Charger being positioned behind a glasswindow will all dramatically increase the time needed to charge itsbattery.
ComponentsIncluded:
1 x Solar Charger
1 x Master Cable
2 x Adaptor for Nokia mobile phones
1 x Adaptor for Samsung mobilephones
1 x Adaptor for Sony Ericsson mobilephones
1×Adaptor forIphones
1 x mini USB adaptorfor Motorola phones, Blackberry, and mostsmartphones, most GPS, Bluetooth headsets, PDA’s.
1×USB adaptorfor charging charger from a PC or a smart phone adaptor.
Note-The Master Cable is used for both charging SolarCharger’s internal battery from a connection to a computer’s USB(using the USBadaptor) and also for deliveringpower from Solar Charger to charge a device.
OperationInstructions
- To Charge solar charger’sinternal battery from a smartphone adaptor.
Insert theUSBtipintothe end of the Master Cable, then insert the DC tip into the Solar Charger socket(fig 1).Insert the USB plug on the other end of thecable into asmart phone adaptor.
LED indicatorlight will turn blue. Solar Charger will be fully charged when theLED indicator light turns red.
- To charge Solar charger’sinternal battery from a PC.
Insert the USB tip intothe end of the Master Cable, then insert the USB plug onthe end of the cable into a PC, laptop or other suitable device(which is switched ON).Insert the DC tip intoSolar Charger socket(fig 2).LED indicator light will turn blue. Solar Chargerwill be fully charged when the LED indicator lightturns red.
Note-Please do not leave the USB charger cableplugged in overnight as damage to the battery may occur.
important-Thismethod of charging is recommended for the first charge from new andmay take up to 8 hours.
- To charge from the solarpanel
When Solar Charger is directed atdaylight, LED indicator lights (fig 3)will illuminate. Charging will take placeimmediately and it will take as little as 10 hours in brightsunshine, with Pico positioned outdoors, to fully charge itsbattery.
Note-Be careful not to scratch the surface of thesolar panels and do not clean them with any strongdetergent.
- To charge an electricaldevice from Solar Charger
Insert the DC end ofthe Master Cable into the Power Out socket (fig 4).Select thecorrect adaptor tip and insert into it the other end of the MasterCable.
- Checking how much poweris in Solar Charger’s internal battery
To determine how much power isavailable in Solar Charger (using the Master Cable and tip or adevice’s sync cable). Upon connection, LED indicator lights willilluminate.
Note-If your device is not supported by one of theadaptor tip’s in this pack you can connect the USB sync/chargecable that was originally supplied with your device into SolarCharger Power out socket (fig 3). Finally insert the tip (from theMaster Cable or a sync cable) into the device to becharged.
Warning
- Keep Solar Charger from fire;water and any form of moisture to ensure damage and injury do notresult.
- Any severe shock or impact mayresult in damage to Solar Charger.
Do notdismantle Solar Charger or its internal component

